Wildcat Strike PTO (id:#62351)
Saipan Town, Angaur Island
1944-09-17 (50 others)
106: Kangaroo Hop (ASL 5a - For King and Country)
ABtF01: The Prize (HASL 6 - A Bridge Too Far)
ABtF CG I: Block by Bloody Block (HASL 6 - A Bridge Too Far)
ABtF CG III: A Bridge Too Far (HASL 6 - A Bridge Too Far)
A 32: Zon with the Wind (AH:ASL Annual `91)
BB11: Kangaroo Hop (Backblast # 2)
G43: Kangaroo Hop (AH:The General # 31.6)
S14: 88s at Zon (ASL Starter Kit #2)
TB 1: Breaking In (Arnhem: The Third Bridge (1st Ed.))
TB CG 1: Taking the Prize (Arnhem: The Third Bridge (1st Ed.))
RP 6: Slam Dance (Rout Pak I)
M4: Tiger Route (Rout Report # 1)
Z11: Slam Dance (Rout Report # 4.4)
FE 125: Lessons Learned the Hard Way (Oblivion Pack)
GSTK 3: Real Men Stay in School (God Save the King)
GSTK 4: The Pillbox (God Save the King)
GSTK CG 1: God Save the King (God Save the King)
MM98-D: Climax at the Mures Defile (March Madness `98 Pack)
CAW11: Operation Wellhit (Canada At War 2)
PJ1.3: Gough, Forward!!! (OAF Playtester's Journal # 1)
PJ1.4: Grave Bridge (OAF Playtester's Journal # 1)
PJ2.4: Horrock's XXXth Corps (OAF Playtester's Journal # 2)
SE5.2: Rough Road to Arnhem (OAF Special Edition # 5)
SP7: Delayed on Tiger Route (Schwerpunkt # 1)
SP104: Easy's Bridge (Schwerpunkt # 9)
SK 1: The Long Left Flank (ASL Digest # 3.10)
Pegasus 1: Problemet Krafft! (Unknown)
Mission 3: Hell’s Highway (Band Of Brothers)
RPT6: Cadets and Cadre (Rally Point # 1)
1: Tiger Route (Witches Cauldron: Oosterbeek Perimeter)
6: Valley of the Dead (Peleliu: White Beach One)
ATB1: Night March (Arnhem: The Third Bridge (4th Ed.))
BB 22.1: Less Than Expected (Coastal Fortress)
BBD # 1: Tiger Route (Brave But Doomed)
BBD # 2: Brave But Doomed (Brave But Doomed)
GJ137: Krafft's Blocking Line (Part I) (Grumble Jones)
GJ137: Krafft's Blocking Line (Part II) (Grumble Jones)
VV57: Tiger Route (Vae Victis HS #11)
CA!12: Steel From Stalin (Counterattacks 2)
SB5: Stampede of the Wild Buffaloes (ASL Journal #11)
188: Zon with the Wind (ASL 3a - Yanks (2nd Edition))
#1: New Street Brawl (Battle at Best)
#2: Incident At The Crossroads (Battle at Best)
#7: Snap Back (Monte Altuzzo: Gothic Line 1944)
Q16: Defence of St. Oedenrode (Quick 6 Scenario Pack III)
WO37: The Vital Hours (Winter Offensive Bonus Pack #12 2021)
BISt #4: New Allies (Steel And Blood)
HFP #8: Along The Opalos-Vilagos Line (Freedom's Price - Hungary 2)
DB183: St. Oedenrode Bridge (Dispatches from the Bunker #57)
AR1: Broken Column ( ASL Arnhem 2024)
ABtF01: The Prize (HASL 6 - A Bridge Too Far)
ABtF CG I: Block by Bloody Block (HASL 6 - A Bridge Too Far)
ABtF CG III: A Bridge Too Far (HASL 6 - A Bridge Too Far)
A 32: Zon with the Wind (AH:ASL Annual `91)
BB11: Kangaroo Hop (Backblast # 2)
G43: Kangaroo Hop (AH:The General # 31.6)
S14: 88s at Zon (ASL Starter Kit #2)
TB 1: Breaking In (Arnhem: The Third Bridge (1st Ed.))
TB CG 1: Taking the Prize (Arnhem: The Third Bridge (1st Ed.))
RP 6: Slam Dance (Rout Pak I)
M4: Tiger Route (Rout Report # 1)
Z11: Slam Dance (Rout Report # 4.4)
FE 125: Lessons Learned the Hard Way (Oblivion Pack)
GSTK 3: Real Men Stay in School (God Save the King)
GSTK 4: The Pillbox (God Save the King)
GSTK CG 1: God Save the King (God Save the King)
MM98-D: Climax at the Mures Defile (March Madness `98 Pack)
CAW11: Operation Wellhit (Canada At War 2)
PJ1.3: Gough, Forward!!! (OAF Playtester's Journal # 1)
PJ1.4: Grave Bridge (OAF Playtester's Journal # 1)
PJ2.4: Horrock's XXXth Corps (OAF Playtester's Journal # 2)
SE5.2: Rough Road to Arnhem (OAF Special Edition # 5)
SP7: Delayed on Tiger Route (Schwerpunkt # 1)
SP104: Easy's Bridge (Schwerpunkt # 9)
SK 1: The Long Left Flank (ASL Digest # 3.10)
Pegasus 1: Problemet Krafft! (Unknown)
Mission 3: Hell’s Highway (Band Of Brothers)
RPT6: Cadets and Cadre (Rally Point # 1)
1: Tiger Route (Witches Cauldron: Oosterbeek Perimeter)
6: Valley of the Dead (Peleliu: White Beach One)
ATB1: Night March (Arnhem: The Third Bridge (4th Ed.))
BB 22.1: Less Than Expected (Coastal Fortress)
BBD # 1: Tiger Route (Brave But Doomed)
BBD # 2: Brave But Doomed (Brave But Doomed)
GJ137: Krafft's Blocking Line (Part I) (Grumble Jones)
GJ137: Krafft's Blocking Line (Part II) (Grumble Jones)
VV57: Tiger Route (Vae Victis HS #11)
CA!12: Steel From Stalin (Counterattacks 2)
SB5: Stampede of the Wild Buffaloes (ASL Journal #11)
188: Zon with the Wind (ASL 3a - Yanks (2nd Edition))
#1: New Street Brawl (Battle at Best)
#2: Incident At The Crossroads (Battle at Best)
#7: Snap Back (Monte Altuzzo: Gothic Line 1944)
Q16: Defence of St. Oedenrode (Quick 6 Scenario Pack III)
WO37: The Vital Hours (Winter Offensive Bonus Pack #12 2021)
BISt #4: New Allies (Steel And Blood)
HFP #8: Along The Opalos-Vilagos Line (Freedom's Price - Hungary 2)
DB183: St. Oedenrode Bridge (Dispatches from the Bunker #57)
AR1: Broken Column ( ASL Arnhem 2024)
Designer: Pete Shelling
Starter kit scenario?: Deluxe scenario?:
Balance:
AmericanJapanese
Overview:
Nimitz’s “island hopping” campaign brought the war to the Palaus by the fall of 1944, with Peleliu being the main objective of Operation STALEMATE. Smaller Angaur island was deemed a viable place to build a base for the logistical support that would be required. With fewer Japanese on Anguar, the Army’s 81st Infantry Division, commanded by Major General Paul Mueller, would get its first taste of combat. Mueller feigned a landing on southern Anguar while his main force, the 321st Regimental Combat Team, landed to the northeast. The small but well-equipped and seasoned Japanese Army force was pushed inward towards the only two urban areas on the island – the small “Middle Village” and the logistical center known as Saipan town.Attacker: American (81st Infantry Division "Wildcats" / 710th Tank Battalion)
Defender: Japanese (59th Infantry Regiment)
6.5 turns
Players: 2 OBA: None Night: No| Unit Counts: |
| Squads: A:15.0 D:9.0 |
| AFVs: A:3 M4A1 x 2 M8 HMC |
| AFVs: D:0 |
| Guns: A:0 M2 60mm Mortar D:2 Type 98 High-Angle Machine Cannon Type 1 Machine-Moved Gun Type 89 Heavy Grenade-Launcher |
| Misc Rules: | PTO, LJ (Exc: Brush remains Brush, roads exist), Booby Traps, Fortified Bldg Loc |
| Map Board(s): |
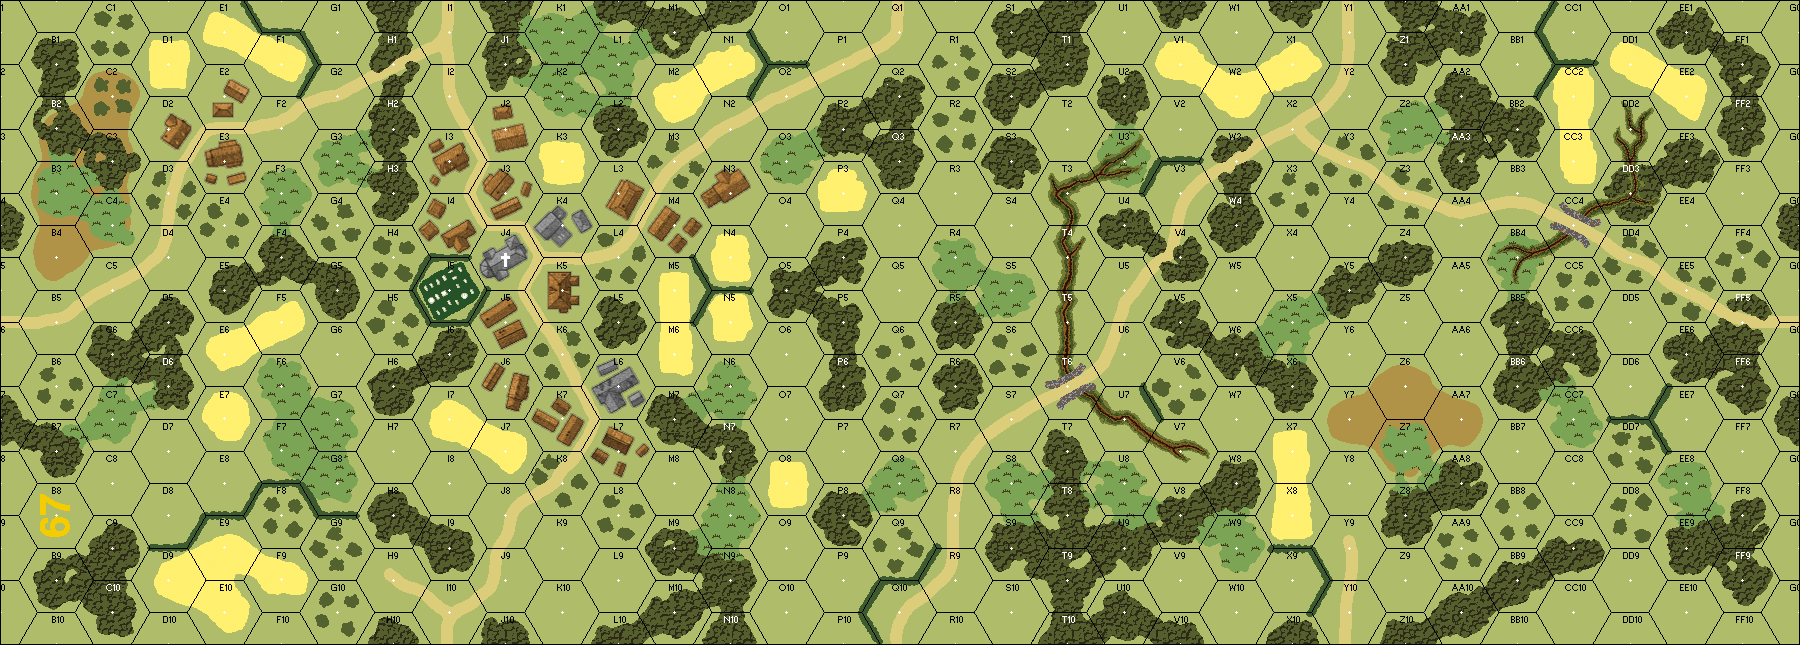
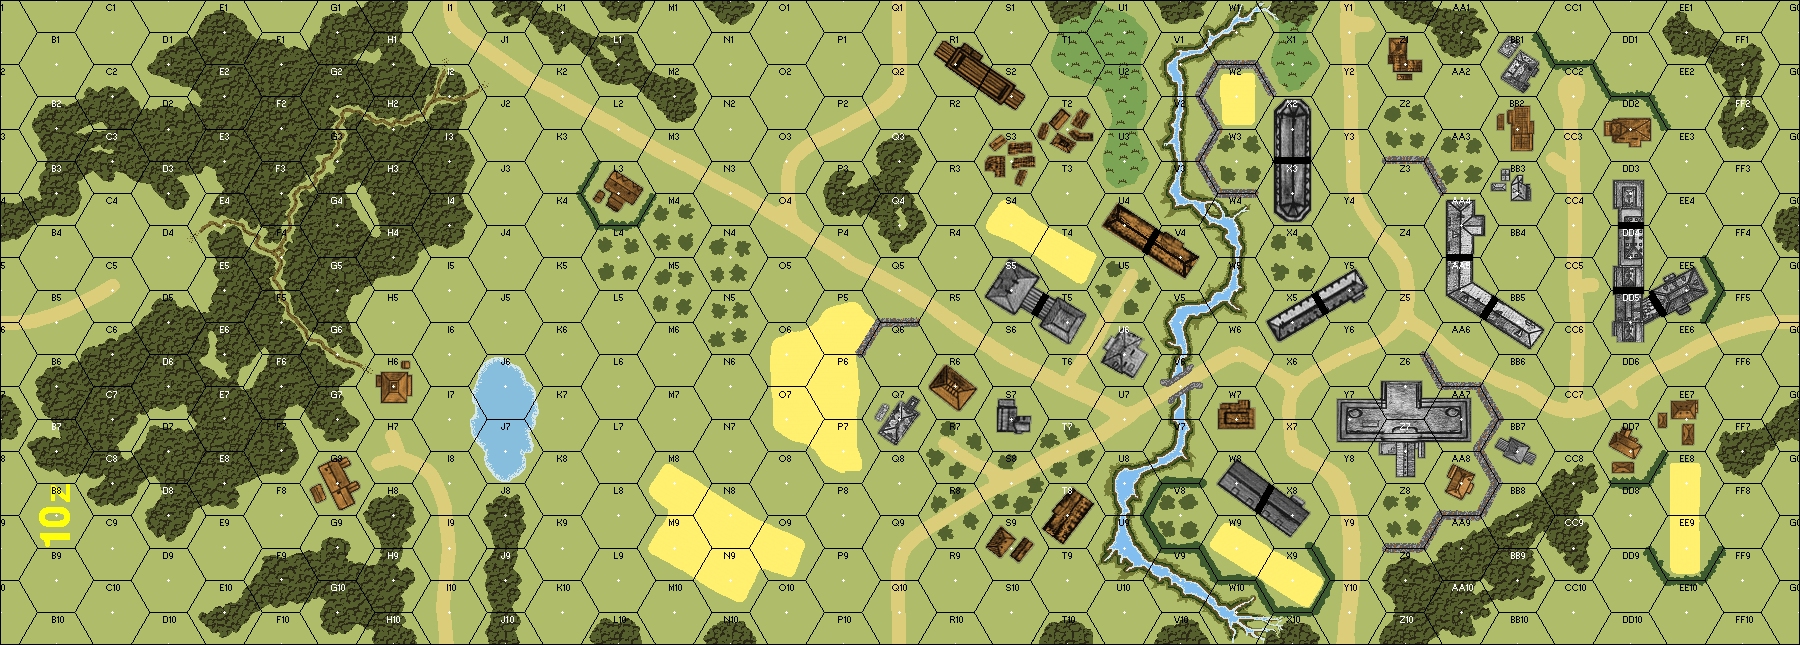
| Overlays: | NONE |
Errata (source)
| Clarification: The bonus Japanese VP count against the 'west of the road Americans'. | Pete Shelling |
Players wanting to play this game/Request a match:
Scenario info
Last Played:
View all or balance report
| Action | Date |
|---|---|
| buser333 Added a playing | 2026-07-30 20:37:41 |
| hoxson1 Modified the unit counts | 2025-11-25 00:08:34 |
| hoxson1 Modified the Defender's Guns | 2025-11-25 00:08:34 |
| aokigaryou Updated the Scenario Publication/ID | 2025-11-24 23:01:52 |
| dmareske Added a playing | 2025-08-03 02:06:58 |
| File | Description | User | Views |
|---|---|---|---|
| (WO16 Wildcat Strike.vsav) | VASL Setup | mikegrogan436 | 1687 |
| (!usa-jap.png) | Image | hoxson1 | 1904 |
| Battle of Angaur (ngeaur.png) | Image | hoxson1 | 2069 |
| VASL Log file (WO16 Paul and Rob.vlog) | VASL Game Log | Paul Legg | 1942 |
| VASL Log file (Wildcat Strike WO16-full.vlog) | VASL Game Log | Dave | 2052 |
| (wildcat strike map N correct wooden bldgs.png) | Map Image | hoxson1 | 1859 |
| (WO16 Wildcat Strike v644 Scenario Archive.jpg) | Map Image | von Marwitz | 1866 |
| Description | Uploaded by |
|---|
| Title | Author | Date |
|---|
| Description | Uploaded by |
|---|---|
| an illustrated AAR by M. Rodgers (opens in new window) | mtrodgers99 |
Quick Map View

Location
Images
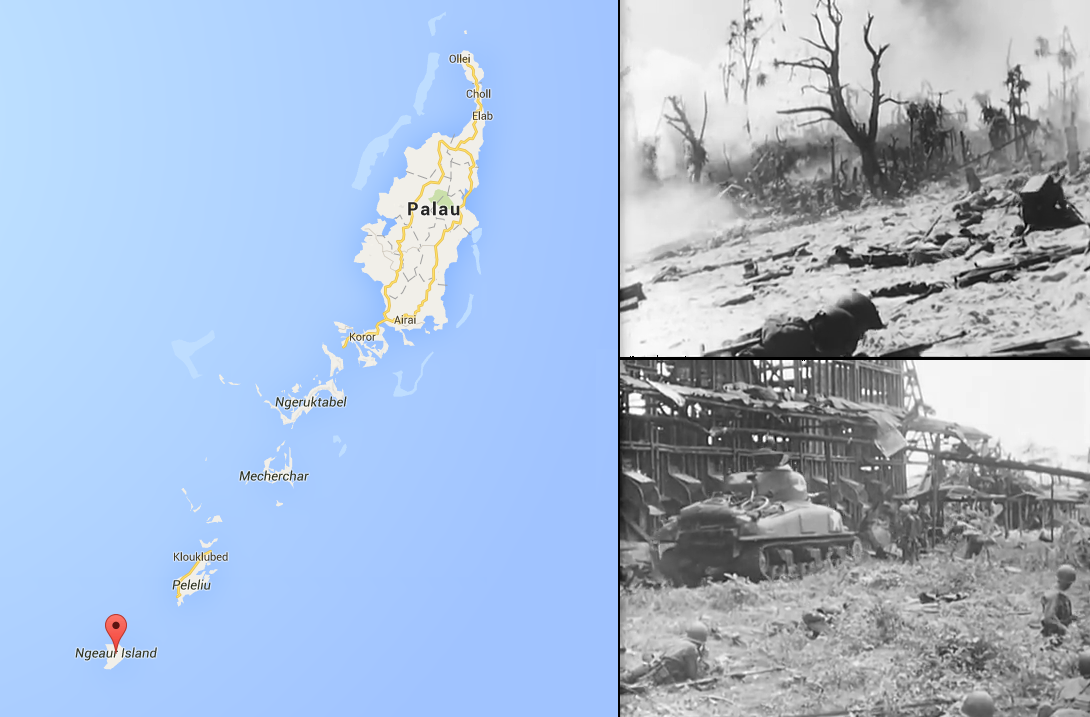
Battle of Angaur

| Statistics: | ||
| Avg Rating: 6.71 | Votes: 31 | Views: | 8293 |
| To-Play list count: | 4 | |
| Estimated Play time: | 4.6 hours | |
| Recorded Games: | 32 | |
| Archive recorded plays: | ||
| American | 13 | |
| Japanese | 18 | |
| Drawn: | 1 | |
| ROAR Data: (as of today) Wildcat Strike [Log in to Confirm or Edit] |
| [A] American | 25 |
| [D] Japanese | 31 |