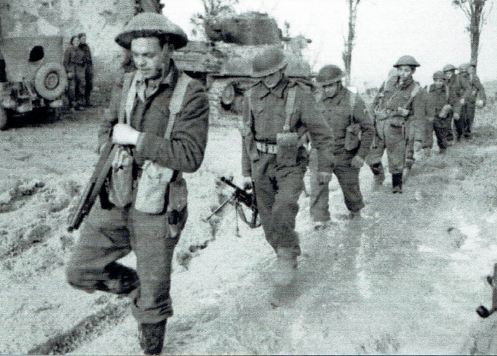
In the early hours, the Loyal Edmonton Regiment, backed by tanks from The Calgary Regiment and a machine-gun platoon from the Saskatoon Light Infantry, embarked on their northward advance. Their objective: to secure the crucial Cider Crossroads, where the San Leonardo-Tollo Road intersected with the Ortona-Orsogna highway. However, as they made their way through the apparently abandoned countryside, they soon found themselves confronting formidable German resistance. Waves of concentrated machine-gun and mortar fire rained down upon them, proving immune to the efforts of even their own artillery. Undaunted, the Loyal Eddies pressed forward, determined to overcome this fierce opposition and achieve their mission.
Attacker: Canadian (Loyal Edmonton Regiment)
Defender: German (Panzer Grenadier Regiment 361, 90 Panzer Grenadier Division)
In the scenario the Germans attempt to prevent the Canadians from crossing the playing area to exit a number of EVP, at least some of which must be infantry.
Grain is changed to Vineyards and Orchards to Olive Groves and any Bog Check receive a +1 DRM.
The Canadians have 10 squad equivalents, three leaders, two each LMG, MMG, ltMTR, PIAT and are reinforced in Turn 2 by two Sherman tanks, one of which has an 8-1 AL.
Initially, the Germans only have 3 squad equivalents, a single 9-1 Leader, one LMG, one HMG and a randomly modified small number of "?" counters. Their support consists of a 50L ATG and a 81mm MTR along with some fortifications consisting of 24 mine factors and a 1-3-5 Pillbox. In Turn 4 German reinforcements arrive in the form of 3 squads, an 8-0 and a LMG. PF are available but at this time in the year only with a range of 1.
The issue for the Germans is - of course - that they are seriously outnumbered. There does not seem to many choices of where most of the initial Germans can sensibly set up. The fortifications and Guns will hopefully present some unwanted surprises for the Canadians. The German reinforcements are supposed to be a plug to block the Canadian exit after the initial Germans have been mostly overcome. If the Germans contrive to slow the Canadians sufficiently in the initial turns and maybe snipe a tank, then things might get close. However, if the Germans fail in reducing the effective numbers of the Canadians or if the few initial Germans go down to quickly, the German reinfocements might be too little too late. Or in the worst case, it might be over even before the German reinforcements arrive.
Unfortunately for my defending Germans, this was "one of these games"...
While the very start seemed promising - a scout HS was killed by mines, however, revealing the location of the minefield. And my Sniper broke an enemy squad.
Alas, that was about the sum of everything I was going to achieve in this game except that my Sniper wounded the weakest leader later. Besides Pinning one unit or two, I simply got no effects at all. My opponent "found" every last minefield, but apart from the first HS, they just walked through and one of his tanks clanked through an AT minefield creating a TB. The other tank drove into the sights of my ATG, which found no APCR and the normal AP round bounced off. The Canadians stepped into the Bore Sighted hex of the 81mm MTR - no effect. They blundered into the Bore Sighted hex of the HMG, which I could not take advantage of because I had to commit its shot elsewhere before. Their "kill stack" walked into the Bore Sighted hex of the ATG, which could not hit them. None of my weapons ever had ROF. So the essential "whittling and weakening" part on which this scenario hinges, did not quite work.
In turn my ATG Gun crew broke on its first MC never to come back. One of his HS advanced out of a minefield unscathed into a concealed HS of mine for CC. I gacked the Ambush and got no result. He rolled snakes to generate a 8-0 leader to add insult to the injury. Next turn, because I was doubly Area Aquired by one of his tanks at 2 hex point blank range, I had to get away my "killer stack" of 9-1, 467+HMG. I also had preserved a concealed 467 shrouded in his Smoke. So to do some shifting and evading and under pressure to achieve anything at all, I calculated my chances concluding that advancing into CC with all these forces vs. his unconcealed HS + 8-0 leader would be the worthwhile thing to do: I had -3 vs. his 0 on the Ambush roll. The odds would be 3:1 @ -1 without Ambush and -2 with Ambush. What could possibly go wrong? I contrived to gack the Ambush despite favorable -3 odds. Still, my roll was good enough to kill his units. But wait, he rolled snakes again, generating another leader - a 8-1 for good measure. Recalculating, my odds shifted from 3:1 to 2:1 and the effect was a Casualty Reduction instead of a kill, which selected the just created 8-1. May he burn in hell! Needless to say, due to his second snakes, both my 467s and the 9-1 died and the HMG was destroyed for good measure. Which was just as well, because besides my 228 crew holding on to the 81mm MTR and a further away halfsquad with LMG, I had no units whatsoever at the end of my Turn 2.
But I am not the kind to give up.
When the jeering Canadians ran for the exit, I did get some more effects as I now recall: The MTR crew broke a passing squad (forfeiting the use of the MTR but placing Residual FP). My LMG HS broke another unit. But that was it. One of his tanks then trundled obliviously through my AT-minefield as aforementioned, thereby leaving a trailbreak and my faintest hopes dashed.
As had no unit left able to fire at Canadian units worth sufficient EVP to simply waltz off unopposed in his upcoming Turn 4 and before the arrival of my reinforcements, my sole remaining Good Order MTR crew raised the white flag to concede at the end of Canadian Turn 3.
Sometimes, ASL is a bitch.
von Marwitz
2025-05-16
(A) David Garvin
vs
Chris Fenn
Canadian win
For Round 2 at CASLO
2024-11-25
(D) Diane Spangler
vs
Lawrence Spangler
D
Canadian win
2024-01-01
(D) Dan Best
vs
Kermit Mullins
German win
First to play and post.
2024-01-01
(A) Kermit Mullins
vs
Dan Best
German win
My Brits got chewed up right out of the gate. German Sniper hit me three times before the end of Turn 1. 81 Mortar got a CRIT hit, which hobbled my 9-1's platoon. Then the 50L AT Gun promptly took out the first of my two Shermans. I threw in the towel before the end of Turn 2 Movement Phase. This scenario is well-scripted to channel the British into a killing zone. Don't be fooled by the small number of Germans. They are well equipped to win this scenario. I failed to get smoke with my 51 Mortars, which in this game was the kiss of death. The Mines block the board edge creeps...so moving into the center is required and especially to keep your tanks from bogging. Personally, I've never enjoyed this kind of scenario.