After the fall of Bataan, the Japanese turned the full weight of their artillery and air force onto the island fortress of Corregidor. For nearly a month, massive guns up to 14 inches in caliber salvoed back and forth across the North Channel of Manila Bay. Finally deciding that the defenses were soft enough for an amphibious landing, assault troops from the 4th Infantry Division secured a beachhead and pushed up the narrow “tail” of Corregidor. The 4/4th Marines – actually an ad hoc force of sailors, soldiers and marines -- armed with little more than small arms and grenades consolidated their positions and waited for the Japanese assault. . .
Attacker: Japanese (1st & 2nd Battalions, 61st Infantry Regiment / 7th Tank Regiment)
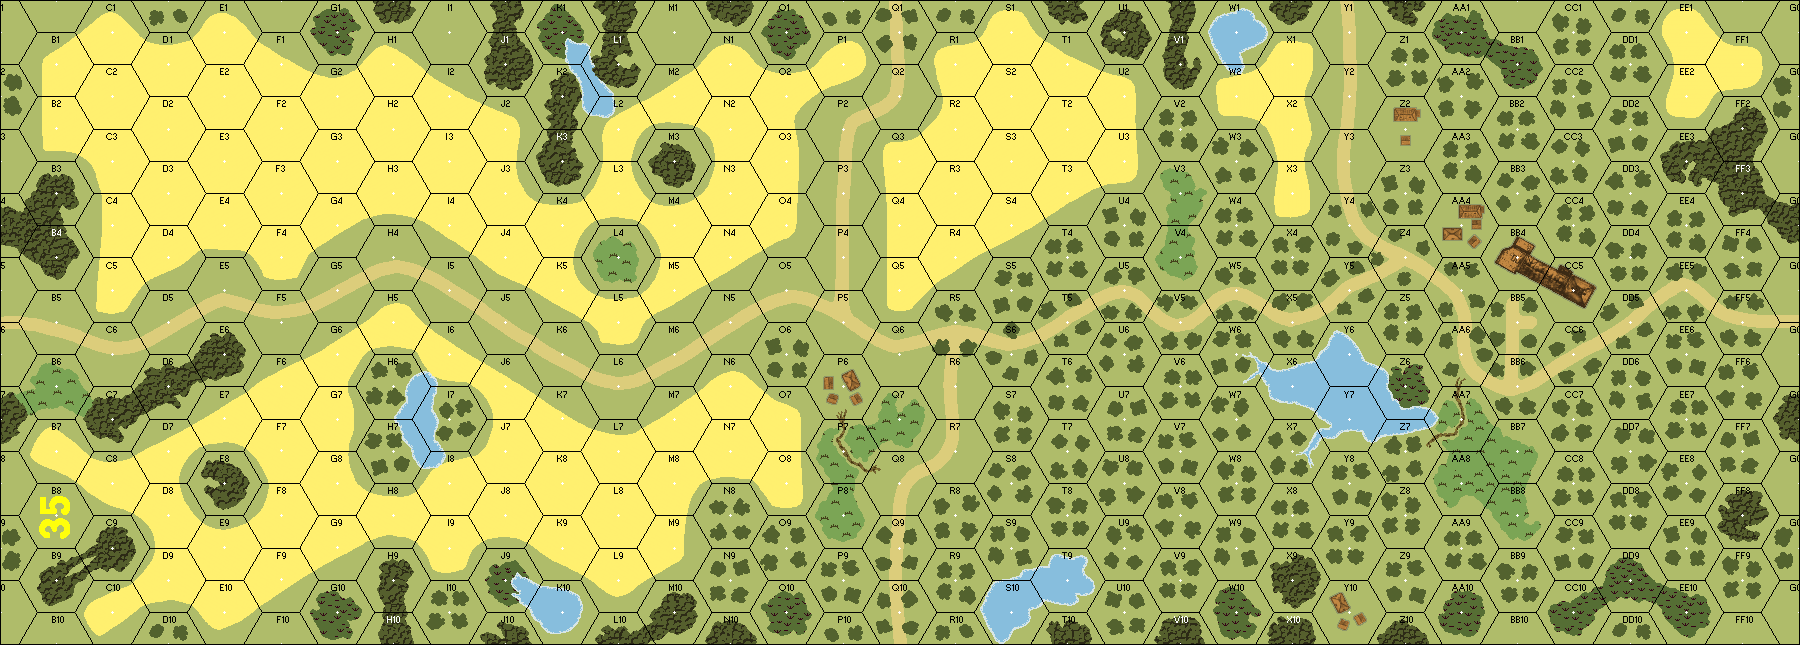
Hard to believe I'd never played this bad boy before now. It'll be a battle of three areas: the northern hill, the eastern hill and surrounding grasslands, and the central and western hills. Each will have their own flavor. We both divided our forces fairly proportionally across all three fronts. The threat of Japanese OBA will be scary, and I tried to make it as difficult as possible for them to place anything in areas not ringed by concealed units. The first two turns were mostly spent with exploratory feelers, with me trying to find a weakness in the east, and him in the north and central. Turn 3 saw the action explode in the middle, with the Japs losing four squads to the Ami's three. The biggest blow for the Japs though saw them lose their 10-0 to a sniper, leaving the center leaderless. This was probably the key moment of the game. It could all come to naught however if the Japs could exit both tanks, forcing an immediate victory. Heck, just the tank with the AL alone would practically win the game. But first they would need to get there and, having just entered, they were at least 2-3 turns away. Turn 4 was no less bloody, a mirror image of Turn 3's 4:3 squad losses. The Japs had sneaked some units on the west central hill, while the Ami attempt to push an exit in the east was rebuffed severely by OBA. Turn 5 saw the Amis get the worst end of the punishment, losing three and a half squads to the Jap's two, and both sides were now looking very lean. Turn 6 would be a big decision for the Japs. Do they try for the exit with the tanks, or do they wait for further infantry support? With a few infantry charging the lines to soak up a couple MG's fire first (including a precious HMG which had a rear shot), the tanks made a break for it. The first was blasted in the butt as it drove past the 9-1/HMG nest and, to make matters worse, the next tank was stopped doing the same. With the rest of the infantry lagging a fair bit, and the Amis falling back to The Rock to help protect it, Scott called it a day. Fun scenario, though a bit anticlimactic when it can all come down to a few shots trying the stop the tanks. And thus completes my playing of the Gung Ho scenarios.
2020-09-18
(D) Paul Works
vs
Dan Best
American (USMC) win
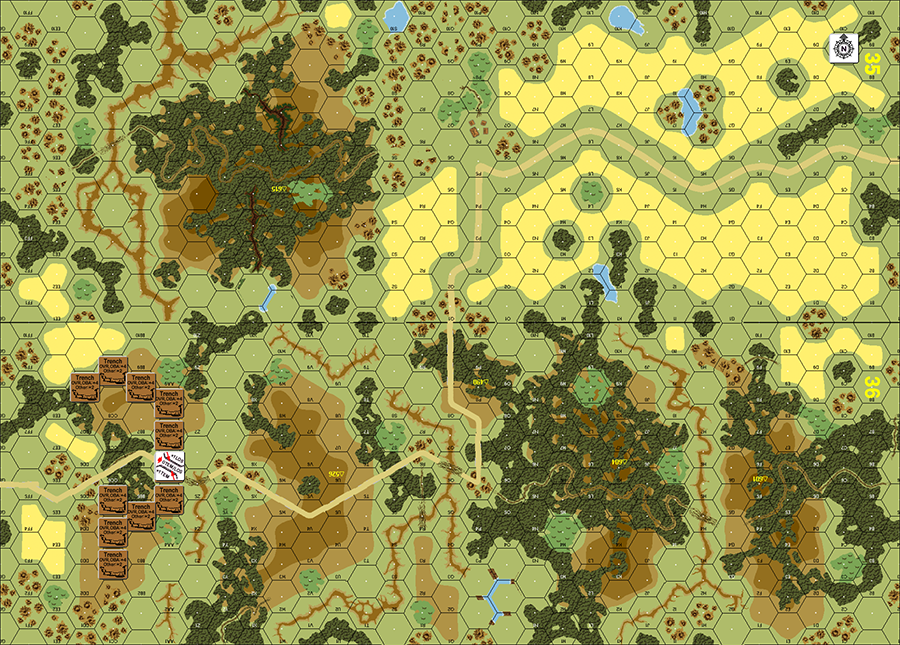
This scenario is a blast! Two ways for the scenario to end creates a situation where both sides have to attack and defend. Dan set up to attack over the hills and through the jungle on Board 36. I had misread the Japanese set up (only off by one board.... doh!) and as a result, Dan was able to get into a platoon(+) of my troops on Turn 1. the result was a shattering of my defenses on that flank. I overreacted and during my Turn 1, I pushed all my forces in the center to cover the exposed flank. This gave Dan a great opportunity for his OBA; he got a bit of good direction and extent-of-error luck and blammo (!) there went three of my 8 ML squads and one of my 9-1 leaders. Ouch. I moved some of my other troops to try to get to the trench line and a handful of squads to slow him down as best I could. At the same time, I moved my 10-2 and the rest of my reinforcements toward my exit area. Dan's tanks entered and he placed one to block my exit area and one moved toward the trench line and his exit area. His handful of troops and tank block my 10-2 and troops for five turns. His tank scored a couple hits that killed several of my reinforcement squads, but also had the effect of battle hardening my 10-2 to a 10-3. I finally got a lucky to Kill DR with my .50cal and stunned his tank. This would have key effects on my last MPh. On the other flank, Dan pushed two prongs around the hill in front of my trench line and a handful right over the top of that hill. The first turn of this push, my five MGs in the trench line shot down several of his squads. The next turn, I malf'd three (3!!) of those MGs. His attack was relentless and by Turn 9, I had one squad and one leader left in the trenches and two crews and one 9-1 leader covering his exit hexes. On Turn 9, during my last MPh, I rushed one squad and a 7-0 toward my Board 35 exit edge; this forced his only two infantry units in the area to fire at them, My 10-3, a squad, and a HS then rushed forward. The latter units had to moved adjacent to his stunned tank to get off the map. His tank's first shot (after turning his turret) was a "2" and a CH. The squad took the CH and the 10-3 helped both it and the HS to pass the resulting effect. The tank's second shot was a "3" and another CH (arrgh). Again the squad took the CH. This time, Dan's effects DR caused a 2MC on the 10-3 and the HS, and a 3MC on he squad. the 10-3 passed, the squad pinned (no exit for him), and the HS passed. The tank intensive fired and got another hit (at least not a CH). All my units passed the resultant MCs. This was the end; my 10-3, a HS, and the earlier-mentioned 7-0 could exit in the Advance phase - these units, together with a couple squads I was able to exit on the far edge of Board 35 - gave me the EVP to get the win. My 10-3 passing his MCs got me the win in this one. This was the funnest scenario I have played in some time; came down to almost the last DR and had lots of swings in momentum and emotion. Really fun - against a fantastic opponent.